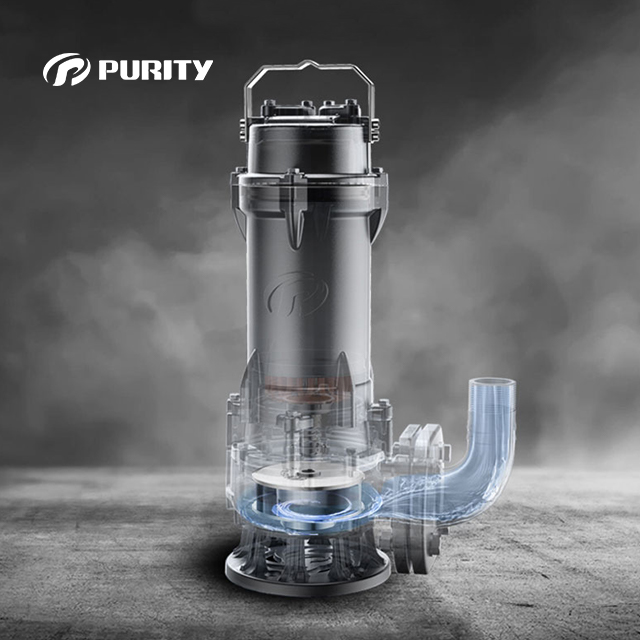
Installing a sewage pump correctly is essential for safely moving wastewater from basements, residential buildings, commercial facilities, or other low-lying areas to a sewer line or septic system.
A typical sewage pump installation includes a sewage basin, submersible sewage pump, discharge pipe, check valve, float switch, vent system, and electrical connection.
So, how do you install a sewage pump? The basic process is to select the right pump, prepare the basin, position the pump, connect the discharge piping and check valve, install the float switch, provide proper venting and electrical protection, and test the system.
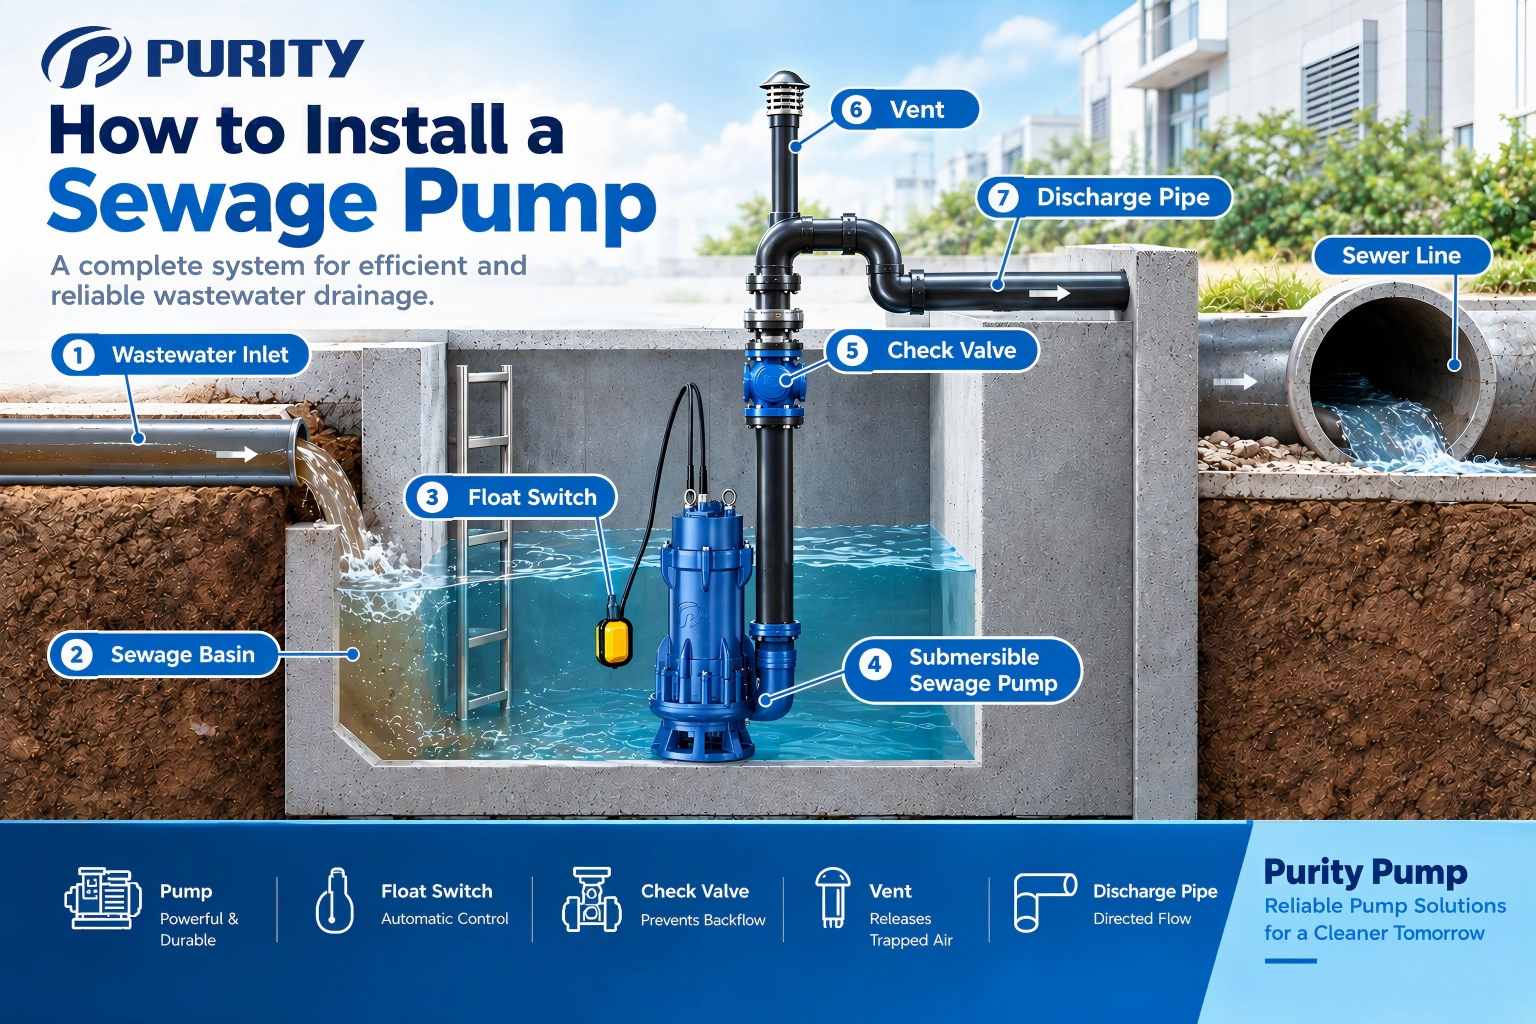 Picture|Sewage Pump Installation Diagram
Show: Wastewater Inlet → Sewage Basin → Float Switch → Submersible Sewage Pump → Check Valve → Discharge Pipe → Sewer Line.
Purpose: This should be the article’s main image. It lets users understand the complete installation structure immediately.
Always follow the pump manufacturer’s installation instructions and applicable plumbing and electrical requirements.
What Is a Sewage Pump?
A sewage pump transports wastewater containing suspended solids when gravity drainage is not sufficient. It is commonly used in basements, residential and commercial buildings, industrial wastewater systems, septic applications, and areas below the main sewer line.
Unlike clean-water pumps, sewage pumps must be selected according to flow rate, total head, solids-handling capability, and application conditions.
What Do You Need for a Sewage Pump Installation?
Before installation, prepare the sewage pump, suitable basin or pit, discharge pipe and fittings, check valve, float switch or level controller, vent connection, electrical protection, and necessary installation tools.
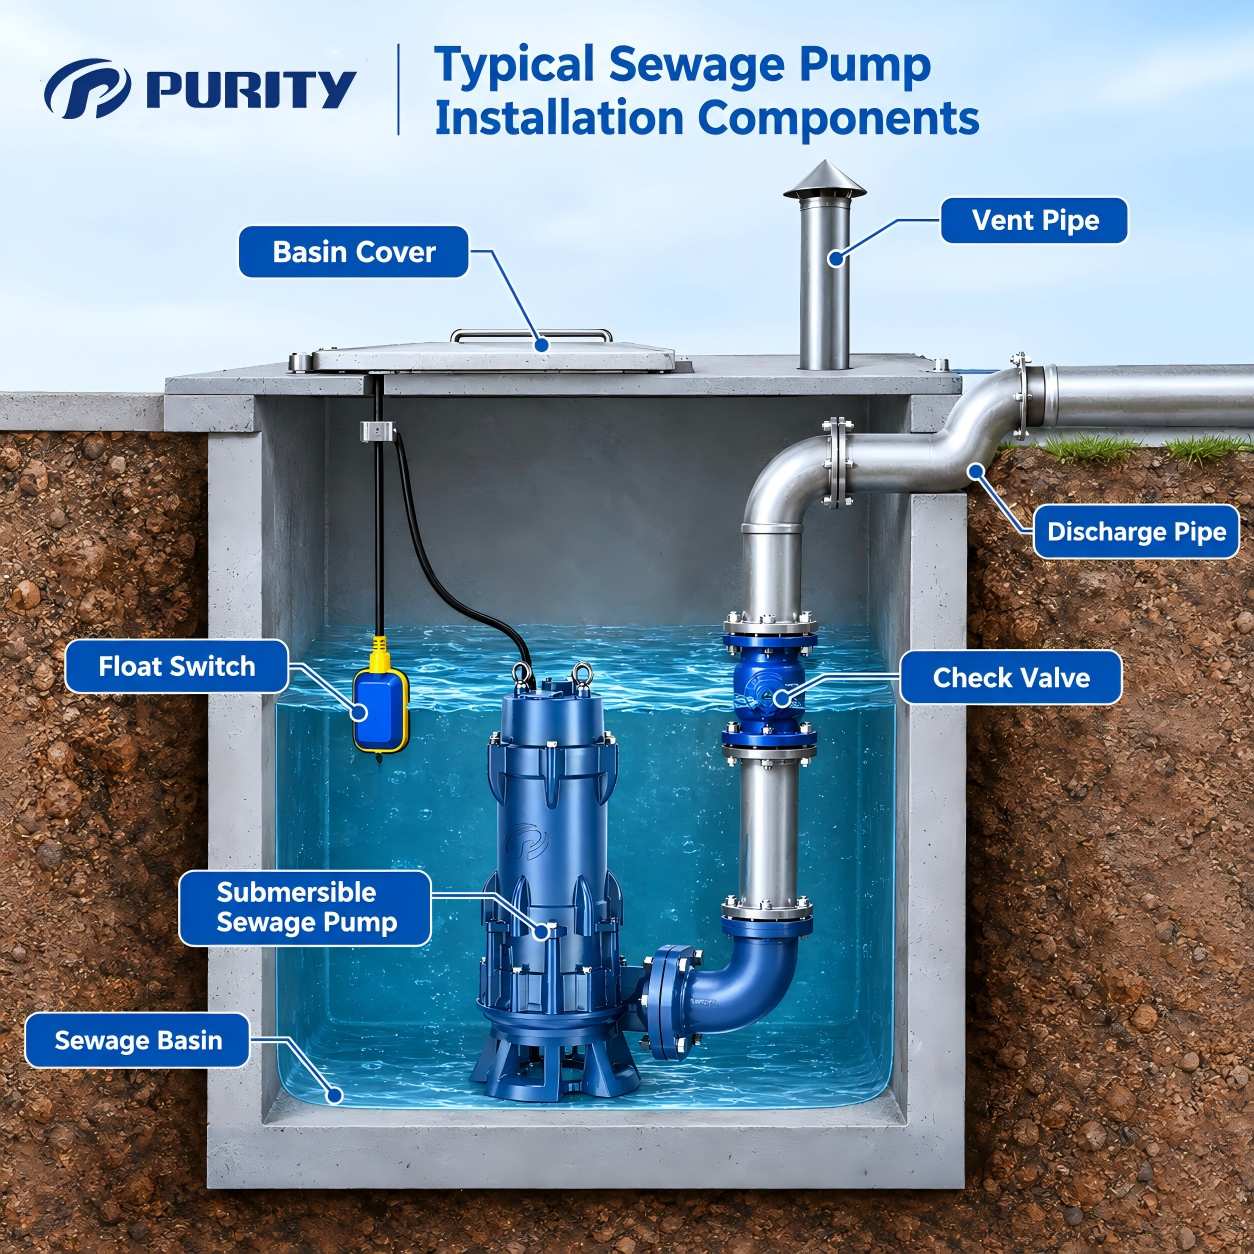
Picture|Sewage Pump Installation Components
Show: Pump, Basin, Float Switch, Check Valve, Discharge Pipe, Vent and Cover.
Purpose: Helps users understand the equipment before starting installation.
Step 1: Select the Right Sewage Pump
Choose the pump according to the required flow rate, total head, and solids-handling capability. For wastewater containing fibrous materials or larger solids, a non-clog or cutter-type submersible sewage pump may be more suitable.
Step 2: Prepare the Sewage Basin
Clean the basin and remove debris. Make sure it is large enough for the pump and float switch, provides a stable pump position, and allows the float to move freely. The basin should also have a suitable sealed cover and vent connection.
Step 3: Position the Sewage Pump
Place the pump securely at the bottom of the basin according to the manufacturer’s instructions. If a float switch is used, make sure it can move through its full operating range without touching the basin wall, piping, pump, or cables.
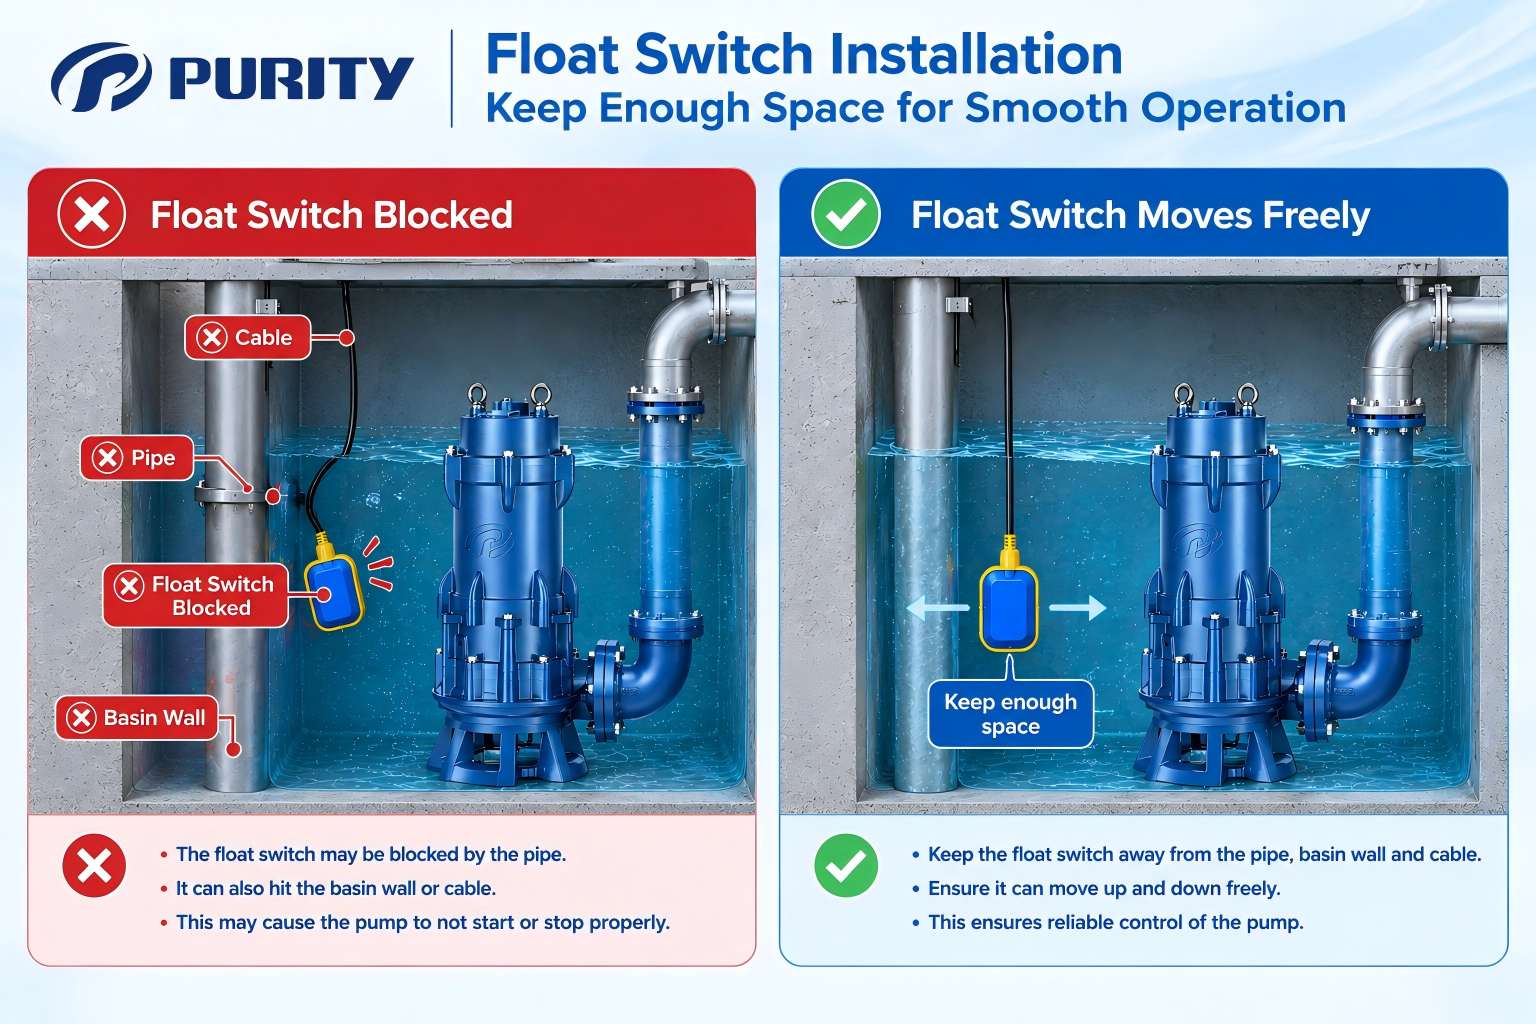
Picture|Correct vs. Incorrect Float Switch Installation
Show one correct installation and several incorrect examples: blocked float, float touching the wall, cable interference.
Purpose: This is a high-value visual because incorrect float positioning is easy to understand visually and can cause pump failure.
Step 4: Connect the Discharge Pipe
Connect the discharge pipe using the correct pipe size and fittings. Avoid unnecessary bends and reductions, and provide a removable connection where maintenance is required. Long discharge runs should be sized according to flow rate and total head.
Step 5: Install the Check Valve
Install the check valve in the discharge line according to the correct flow direction. It helps prevent wastewater from flowing back into the basin after the pump stops, reducing unnecessary cycling and wear.
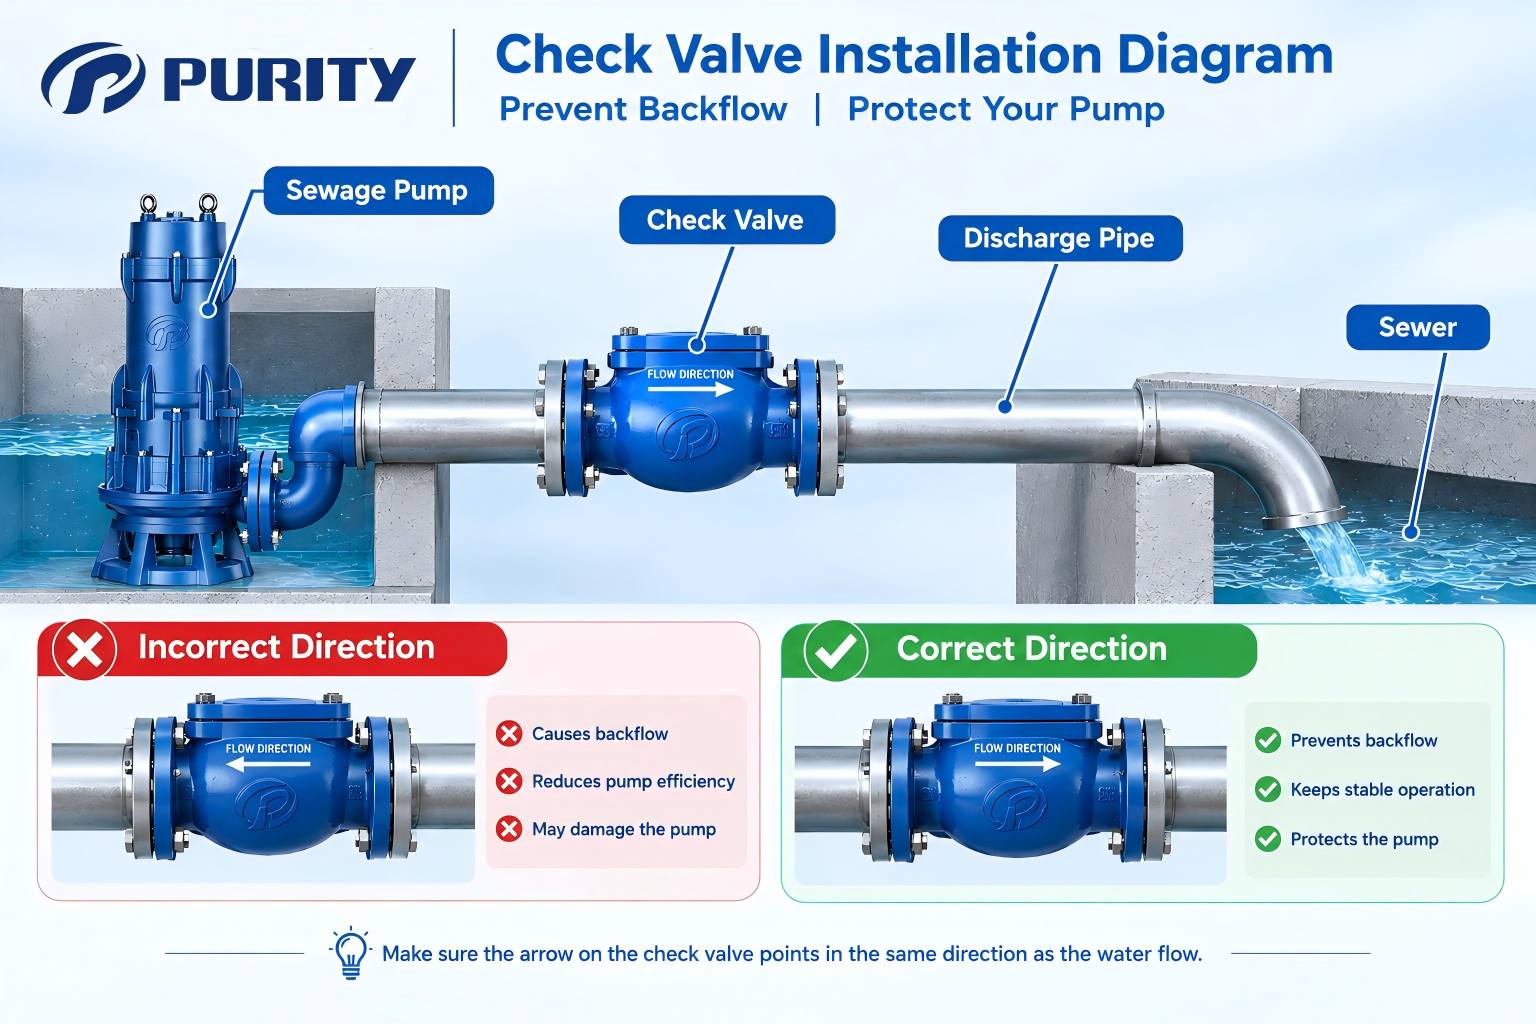
Picture|Sewage Pump Check Valve Installation
Show: Pump → Check Valve → Discharge Pipe → Sewer, with a clear flow-direction arrow.
Purpose: Reinforces one of the most important installation details and makes the article more practical.
Step 6: Install the Float Switch or Level Control
The float switch or level controller should start the pump when wastewater reaches the required level and stop it after the basin is sufficiently emptied. Keep the float free from obstructions and, where possible, away from incoming wastewater flow.
Step 7: Provide Proper Venting and Electrical Protection
A sewage basin requires appropriate venting to manage gases and pressure. Do not confuse the basin vent with an air-relief hole that some pump manufacturers specify on the discharge pipe to prevent air locking.
Electrical connections should follow the manufacturer’s wiring diagram and applicable electrical requirements. Depending on the system, protection may include ground-fault protection, a dedicated circuit, overload protection, proper grounding, and a control panel.
Show: Basin Vent + Control Panel + Float Switch + Pump + Electrical Protection.
Purpose: Converts a relatively technical section into an easy-to-understand system diagram.
Step 8: Seal the Basin Cover
Secure the basin cover using the sealing method specified by the basin manufacturer. A properly fitted cover helps contain odors and gases, prevent debris from entering, and improve overall system safety.
Step 9: Test the Sewage Pump System
Fill the basin gradually with clean water and check the complete operating cycle. Confirm that the pump starts at the expected water level, discharges water correctly, stops at the proper level, and operates without abnormal noise, vibration, leakage, or backflow.
Show: Fill Basin → Float Rises → Pump Starts → Water Discharges → Float Drops → Pump Stops.
Purpose: Gives the reader a simple visual checklist for confirming successful installation.
Common Sewage Pump Installation Mistakes
Common mistakes include selecting a pump only by motor power, using an undersized discharge pipe, blocking the float switch, installing the check valve incorrectly, providing inadequate venting, and ignoring local plumbing or electrical requirements.
Show six simple icons: Wrong Pump Size / Small Discharge Pipe / Blocked Float / Wrong Check Valve / Poor Venting / Incorrect Electrical Connection.
Purpose: Creates a highly scannable summary and reinforces the main points of the article.
Purity Sewage Pumps for Wastewater Applications
Purity provides sewage pump solutions for residential, commercial, and industrial wastewater applications.
The Purity WQ Series Submersible Sewage Pump is designed for wastewater applications and can operate directly in a sewage basin, helping simplify installation where a separate pump room is not required.
For wastewater containing fibrous materials and solids that may cause clogging, the Purity WQQG Cutting Submersible Sewage Pump uses a cutting structure to process certain solids and fibrous materials before they pass through the pump.
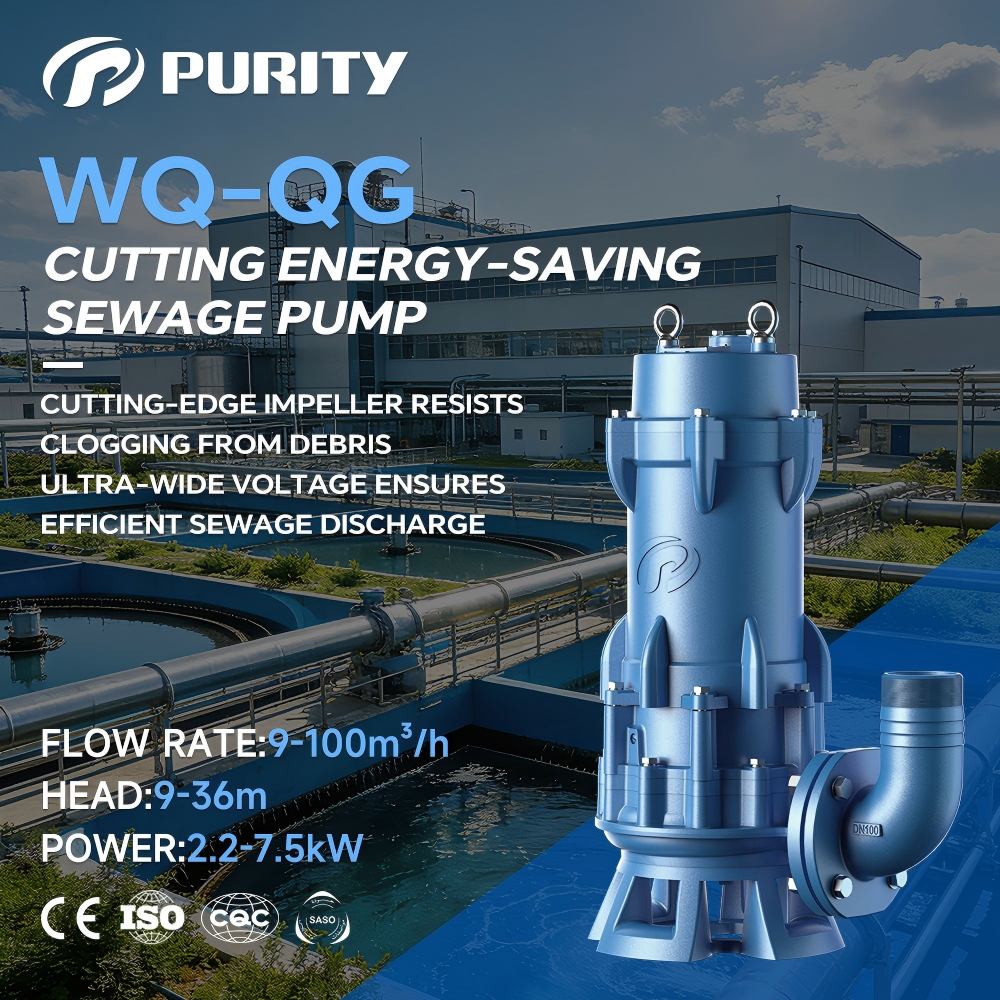
Picture|Purity WQQG Cutting Submersible Sewage Pump
Use a real Purity product image together with a wastewater application scene.
Purpose: This is the main product-conversion image. It transitions naturally from technical education to Purity’s solution.
Sewage Pump Installation FAQ
Can I install a sewage pump myself?
A simple replacement may be manageable for an experienced installer, but complete systems can involve plumbing, electrical, venting, and local code requirements. Professional installation may be required.
Does a sewage pump need a check valve?
In typical installations, a check valve helps prevent wastewater from flowing back into the basin after the pump stops.
Does a sewage pump need a vent?
Yes. Sewage basins generally require proper venting. The exact configuration depends on the installation and applicable plumbing requirements.
Final Installation Checklist
Before regular operation, confirm the pump size, basin, float switch, discharge pipe, check valve, venting, electrical protection, sealed cover, and successful test cycles.
Show: Pump Size ✓ | Basin ✓ | Float ✓ | Discharge Pipe ✓ | Check Valve ✓ | Venting ✓ | Electrical Protection ✓ | Testing ✓
CTA: Need Help Choosing a Sewage Pump? Contact Purity Pump.
Purpose: This is the final conversion point and should lead directly to your inquiry/contact section.
A reliable sewage pump installation requires more than simply placing a pump inside a basin. Correct pump selection, piping, backflow protection, level control, venting, electrical safety, and testing all contribute to reliable operation.
For project-specific requirements, Purity Pump provides sewage pump options and OEM/ODM support based on flow rate, head, motor power, discharge size, and application.
Purity — Reliable Pumps. Professional Solutions.
Post time: Dec-20-2024